First, let’s go through some basic definitions.
Active Directory (AD): commonly called Active Directory Domain Services (AD DS) or Active Directory (AD), it is a directory service created by Microsoft and it provides a hierarchy-based authentication service, providing functionality such as authentication, group and user management, policy administration, allowing computers to access the domain and much more.
LDAP: Lightweight Directory Access Protocol (LDAP), is a protocol used to query and authenticate users and computers in directory services that support it, for example AD.
In this way, LDAP and AD complement each other, LDAP works as a translator for users who want to talk to AD and authenticate themselves, LDAP does the translation between user and AD server.
Active Directory (AD) is an example that uses the LDAP protocol,
but there are several other services that can use the LDAP protocol like OpenLDAP, Apache Directory Server, and more.
ADFS: Active Directory Federation Services is also a protocol like LDAP, but this was developed by Microsoft.
Why use ADFS? Simple, in the past there was no great demand for SSO (Single Sign-ON) in cloud environments, SaaS service providers etc, but that has changed, currently there is a great demand for SSO in multi-company environments, for example, two companies with the same service provider authentication, there are also services like Azure, AWS, ,GSuites etc that can benefit from “federated” authentication. Basically, LDAP is more flexible than ADFS.
Azure AD: Azure AD is an identity management solution, as AD is, but instead of a hierarchically organized structure like AD, in Azure AD it is not possible to include a machine in the domain, create OU’s or GPOs, or even perform queries via LDAP.
Azure AD is cloud based, so HTTP and HTTPS are basically the two ways that users and Azure AD communicate over the internet.
Authentication is performed through protocols such as OAuth and SAML, queries are possible through the use of REST APIs, both authentication and queries occur using HTTP and HTTPS communication.
As with ADFS, Azure AD works as a federated authentication mechanism for managing identities in Internet-based services such as: Microsoft Azure, Office 365, Dropbox for Business, Salesforce, Intranets published on Internet etc. But without using ADFS as a protocol.
vSphere 7 with ADFS and alternatives
vSphere 7 brings the new Identity Federation function, it allows vCenter to use a external identity source for the authentication and multi-factor authentication.
However, only ADFS is supported in Identity Federation, alternatively, we can use an application like Duo (https://duo.com) to serve as an authentication proxy, enabling other protocols and 2FA not only for vCenter 7.0 but for other versions of vCenter.
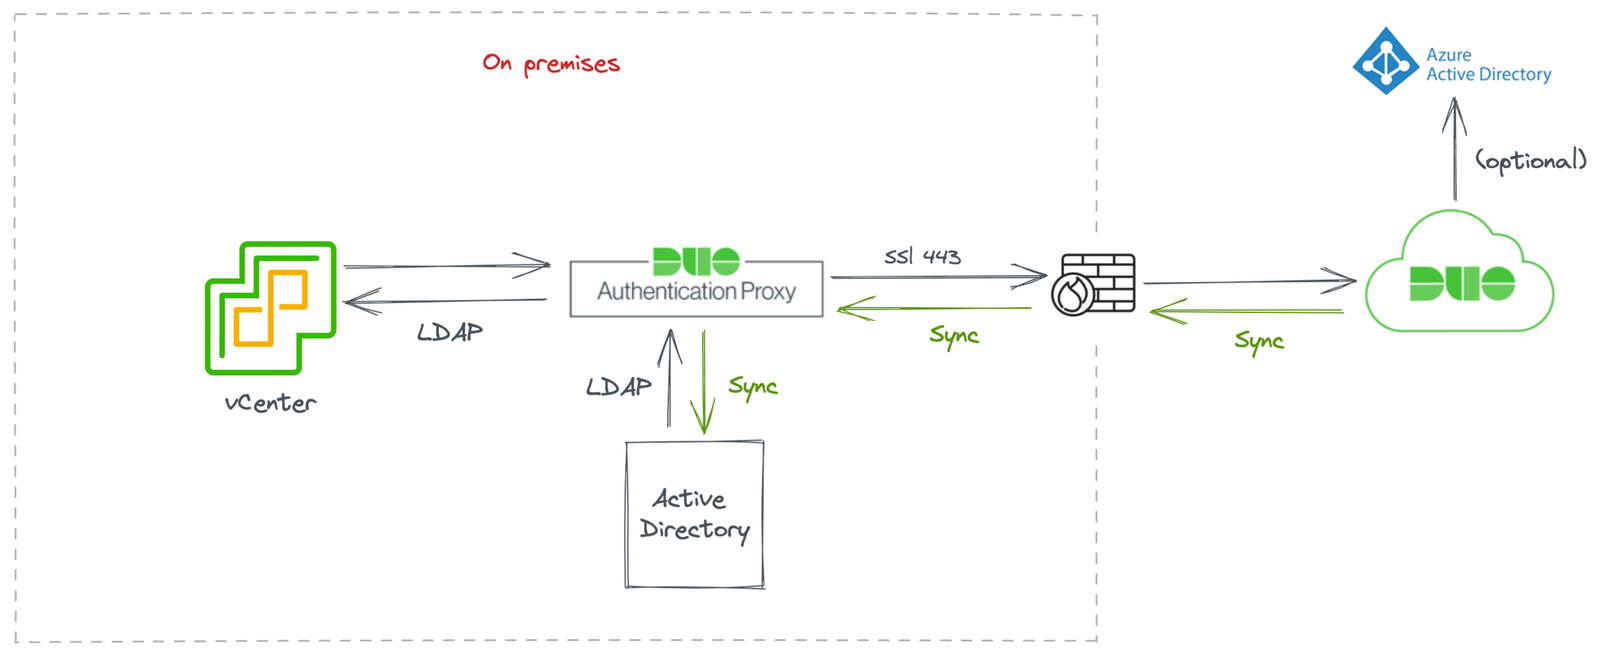
Lets to see the diagram of our test using Duo:
As I don’t have an Azure AD account for testing at the moment I am creating this post, in this post I will use an on-premises AD as the first authentication source, and the PUSH method in the Duo app as 2FA.
Lets start this step-by-step
Creating a Duo account:
Access Duo Security web site (www.duo.com) and create a new account:
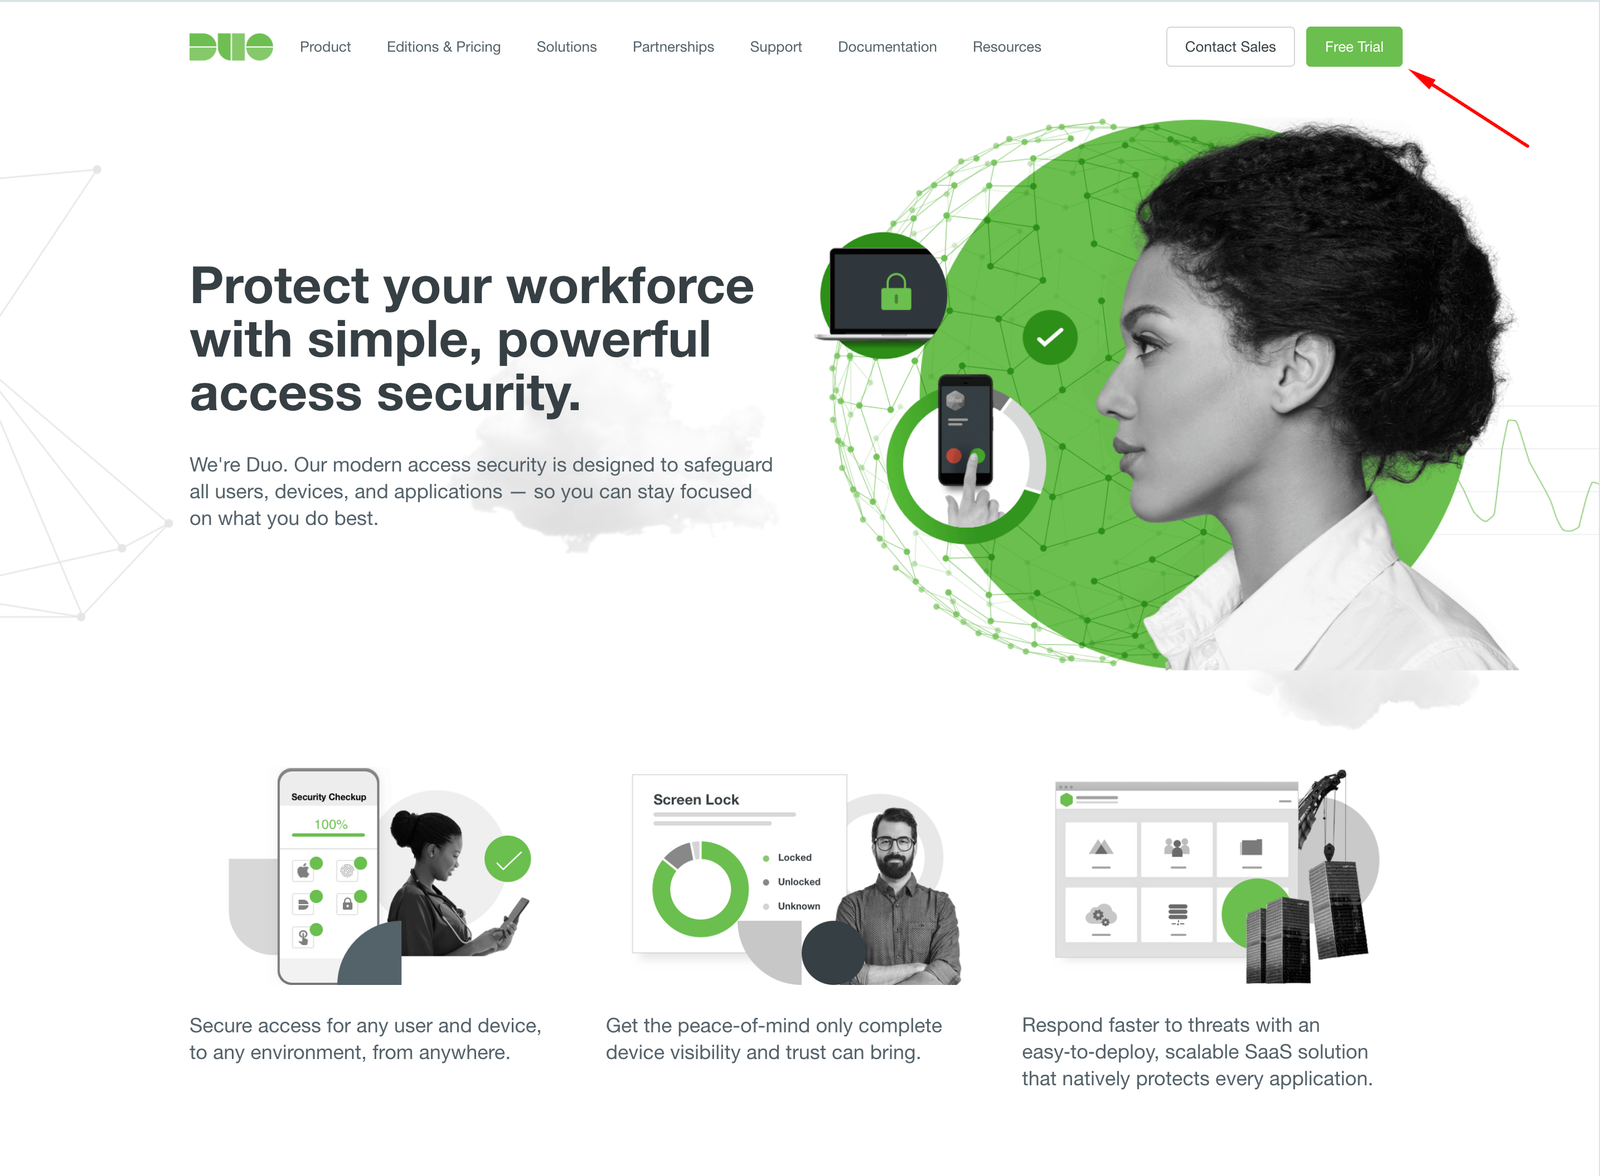
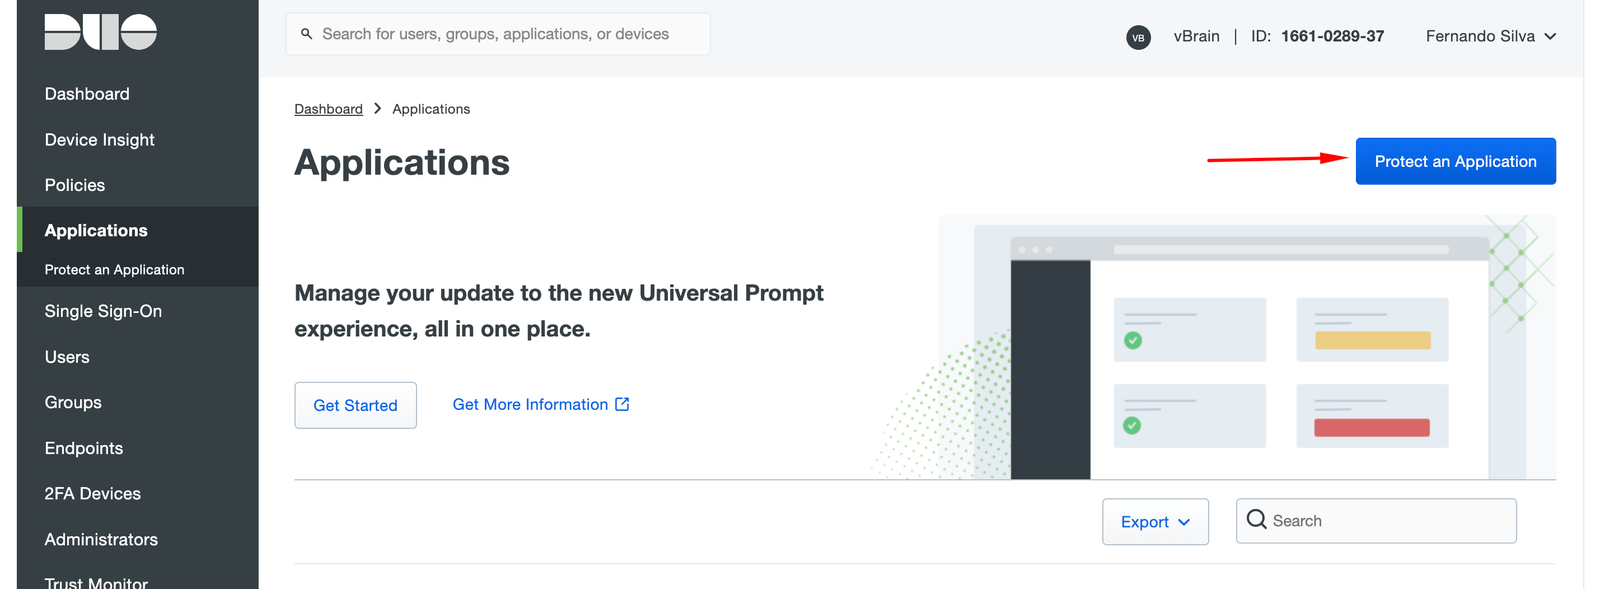
After login, click on Application and Protect an Application
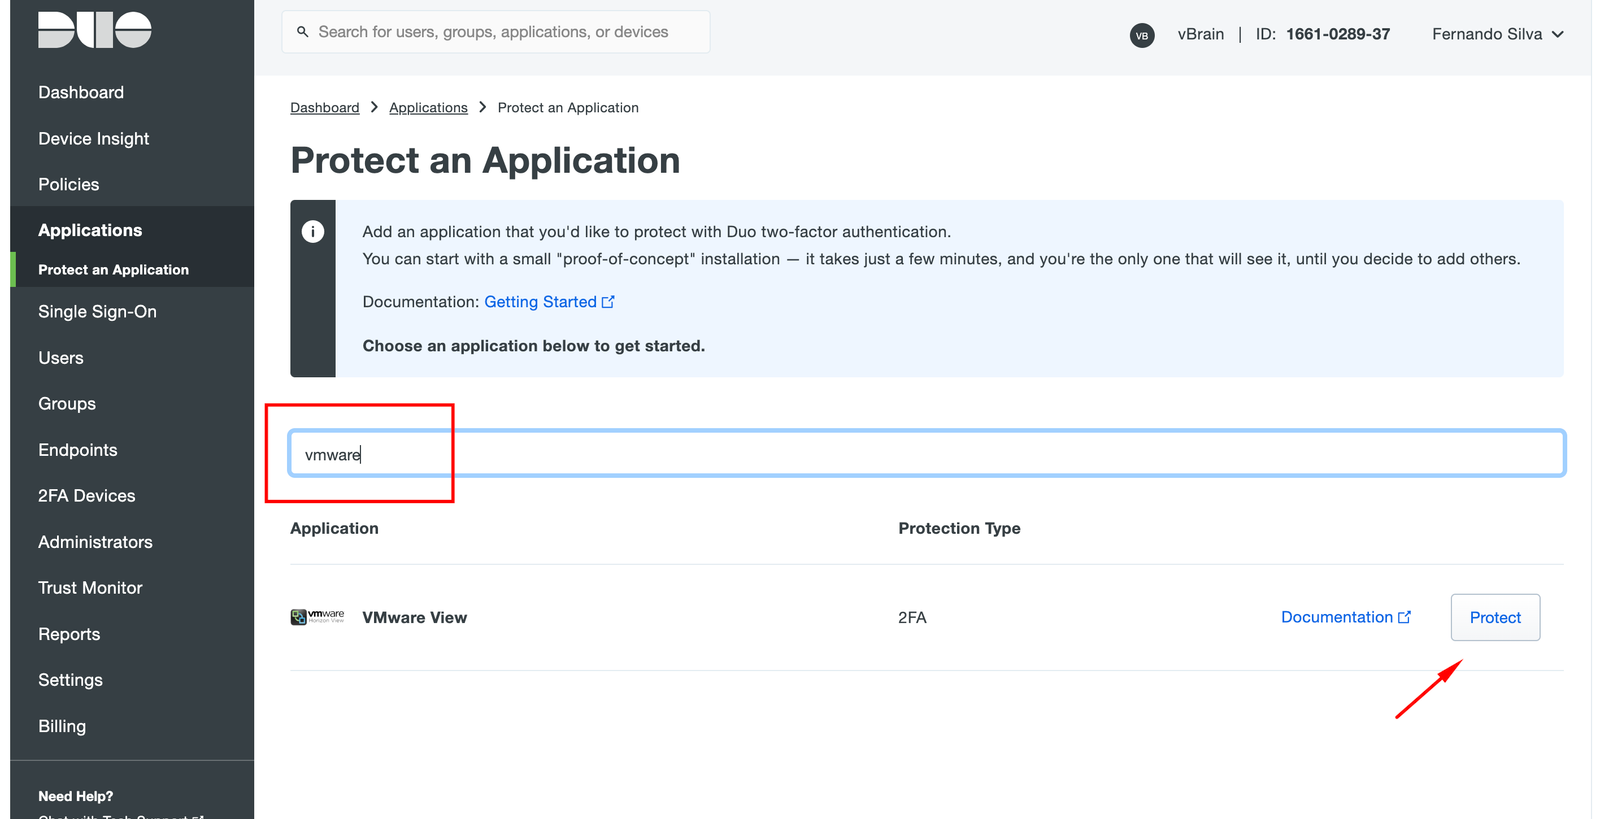
Filter by VMware and choose VMware View, after click in Protect (yes, although only having VMware view (Horizon) as an application, in my tests I got the same results with vCenter)
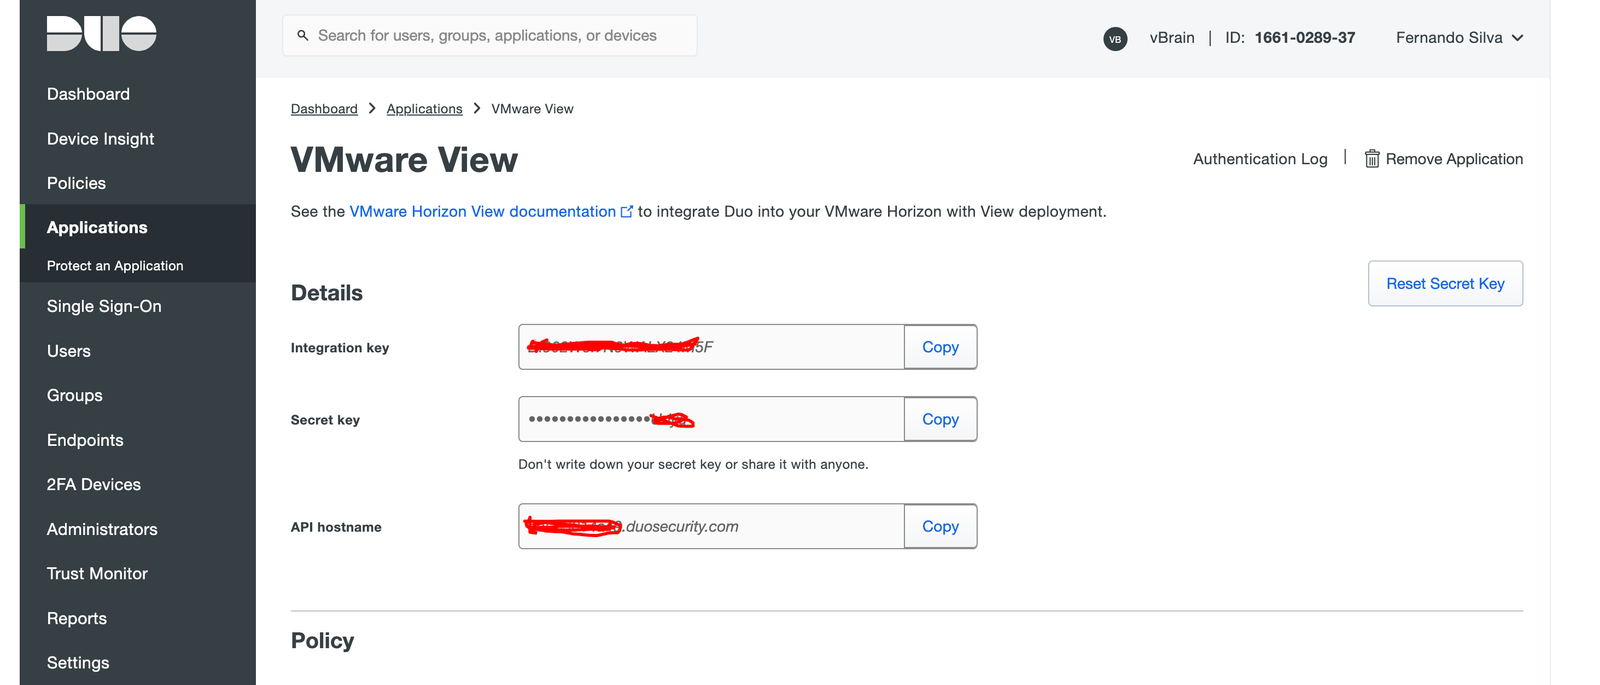
After click on Protect, take a note of Integration Key, Secret Key and API hostname.
Now it’s time to create the VM that will be used as Duo Proxy, it can be created in a windows or linux VM, in my lab I used a VM with Ubuntu Desktop.

After creating the VM that will be used as Duo Proxy, download the package .tar and install, the full reference could be find here (Duo Authentication Proxy Reference | Duo Security). The process is simple, basically it consists of installing the dependencies and running commands like make install.
After installing Duo Proxy, you will need to edit the proxy authentication configuration file, the file is authproxy.cfg and can be found in the following directory:
/opt/duoauthproxy/conf
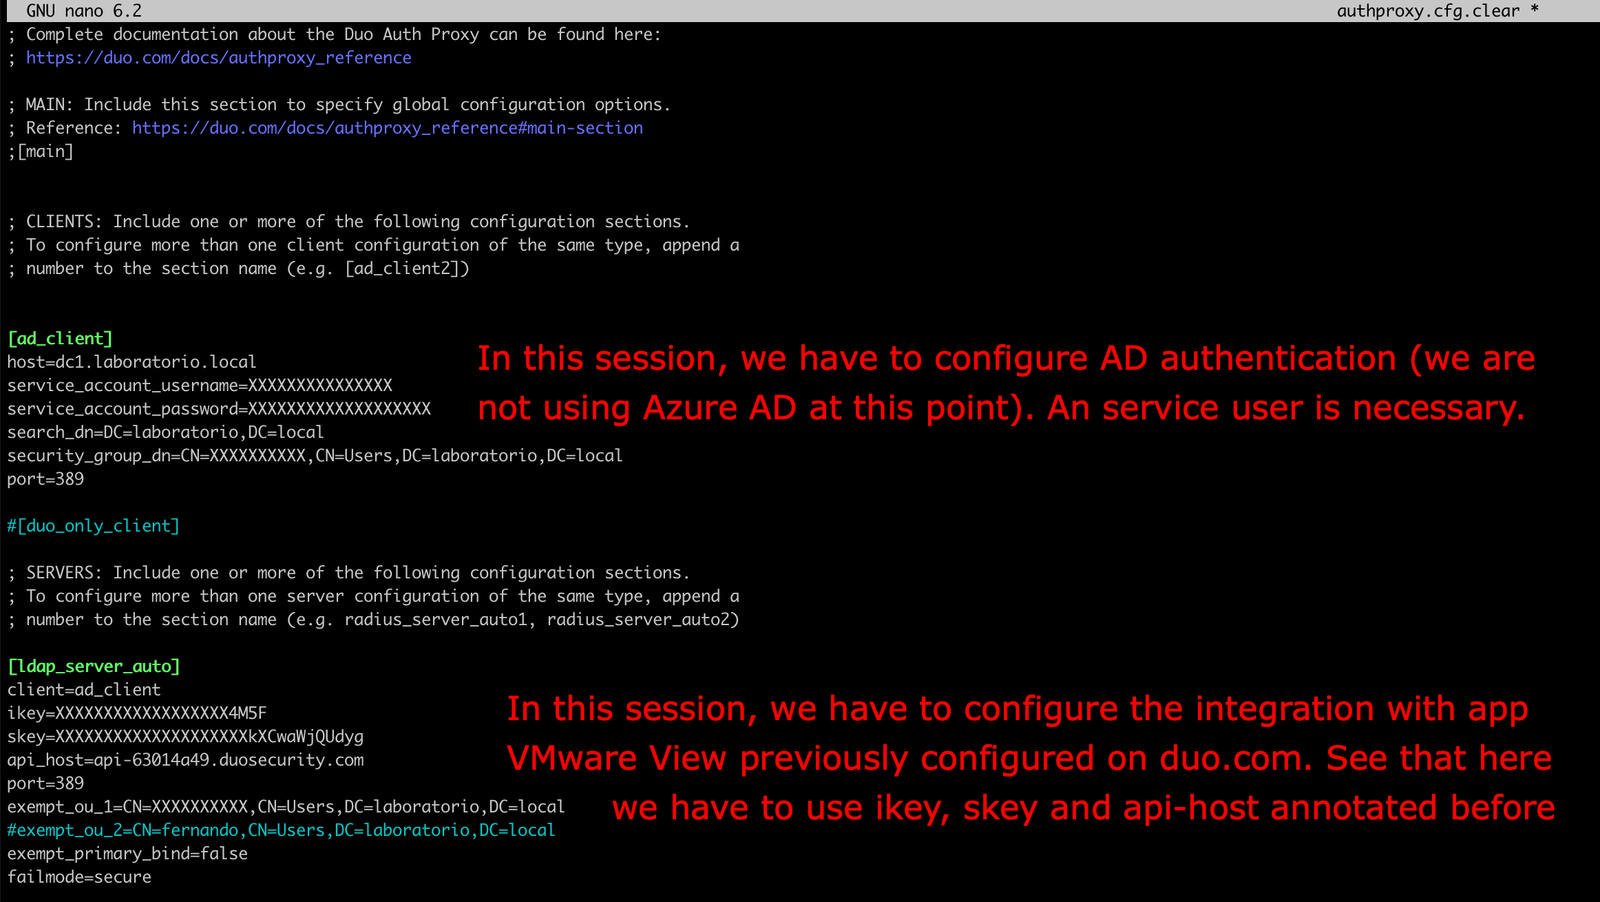
The configuration file works in sessions format, in each session it is possible to configure the authentication type and how it will be used, let’s see an example:
Some parameters here are optional, as exempt_ou_1, that could be used to define a user or group that can login without 2FA.
All options and a complete definition can be found at (Duo Authentication Proxy Reference | Duo Security)
IMPORTANT, whenever the configuration file is changed, restart the service with the following command:
/opt/duoauthproxy/bin/authproxyctl restart
After that, lets to configure Identity Federation on vCenter:
After access vCenter (at this point using local login administrator@vsphere.com), in the menu access Administration, under Single Sign On click on Configuration > Identity Sources and finally ADD:

Fill the information with the information of your environment, the username here has to be the same user configured as username service account.
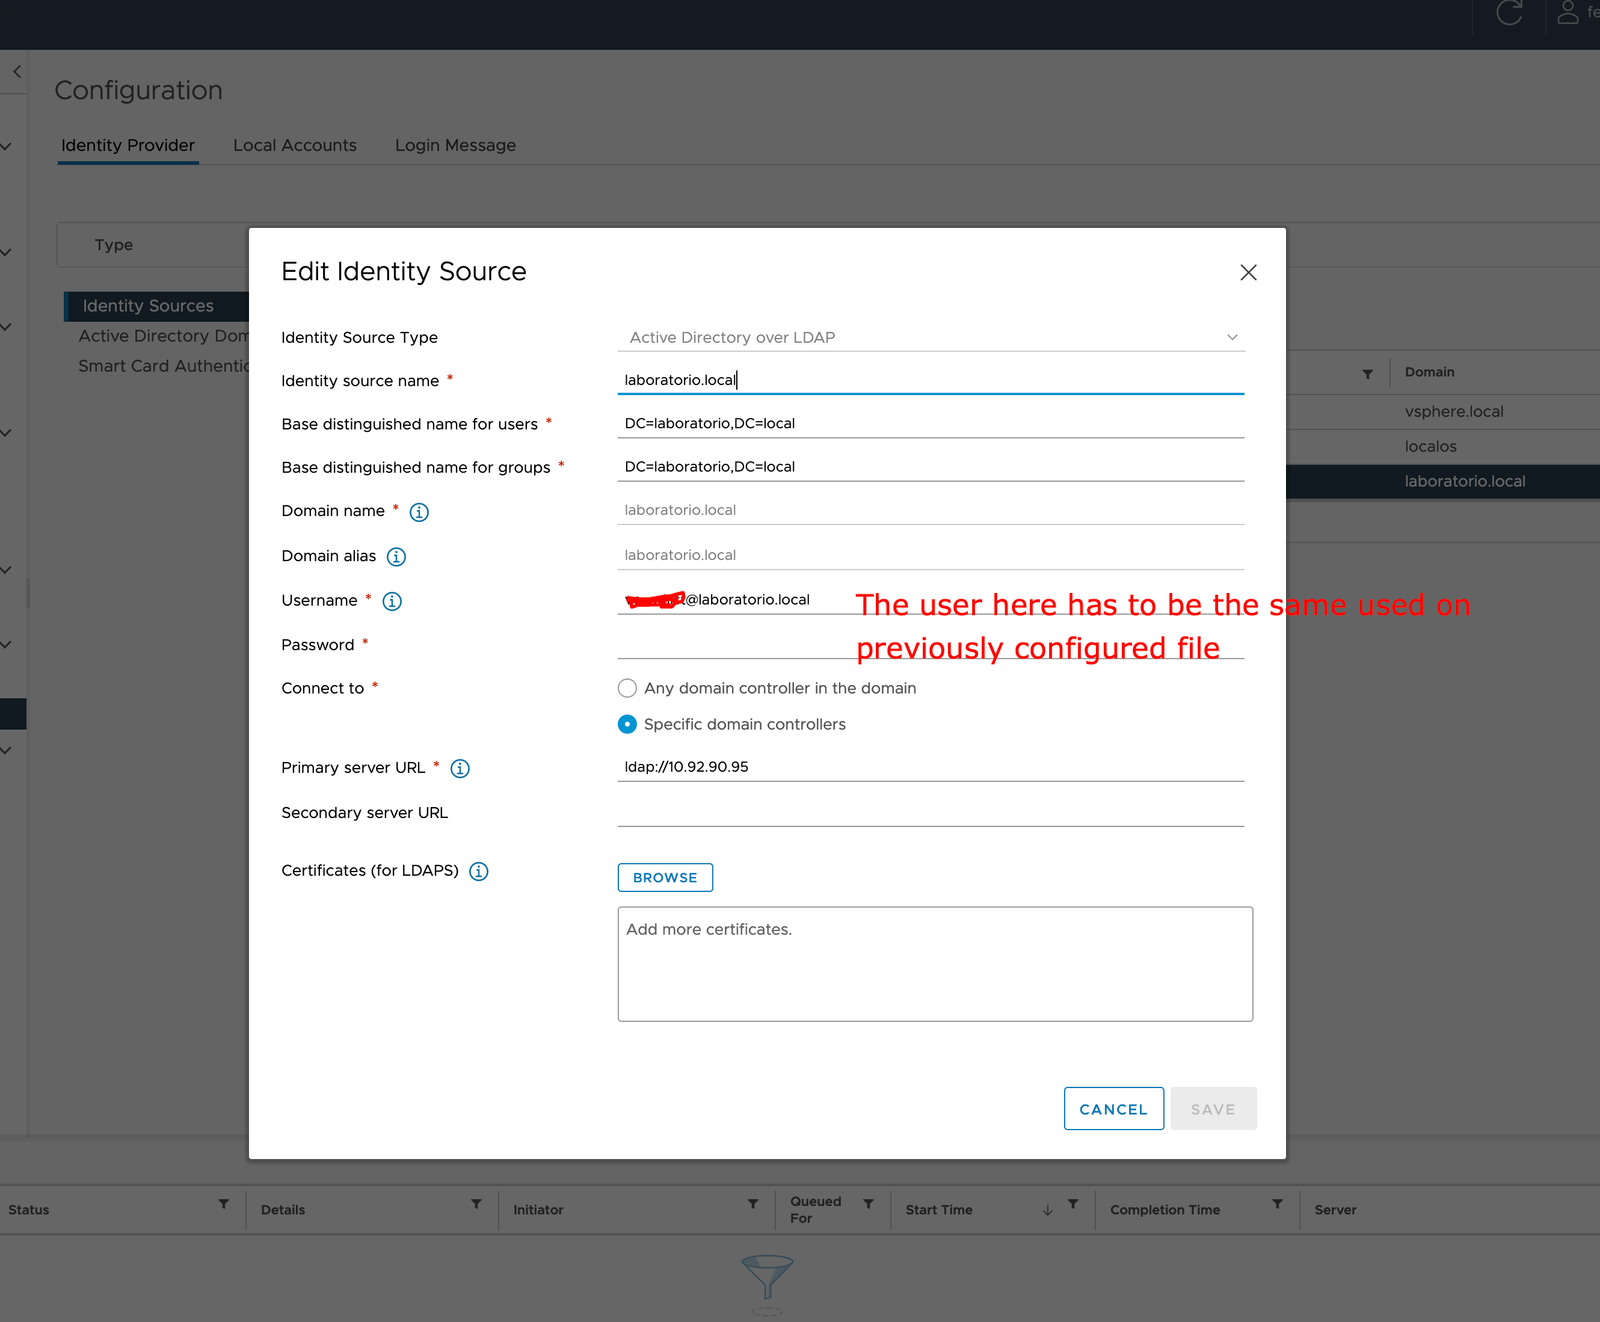
At this point, it is already possible to authenticate in vCenter using proxy authentication, however, without 2FA, let’s now go to directory synchronization in Duo, use the mobile App, etc.
Access https://duo.com and login again. Click on Users and Directory Sync.

You can use some user synchronization sources, such as Azure AD and AD, in my case, as I don’t have Azure AD, I will use conventional AD.

At this point, the sync service will show as a failed process.
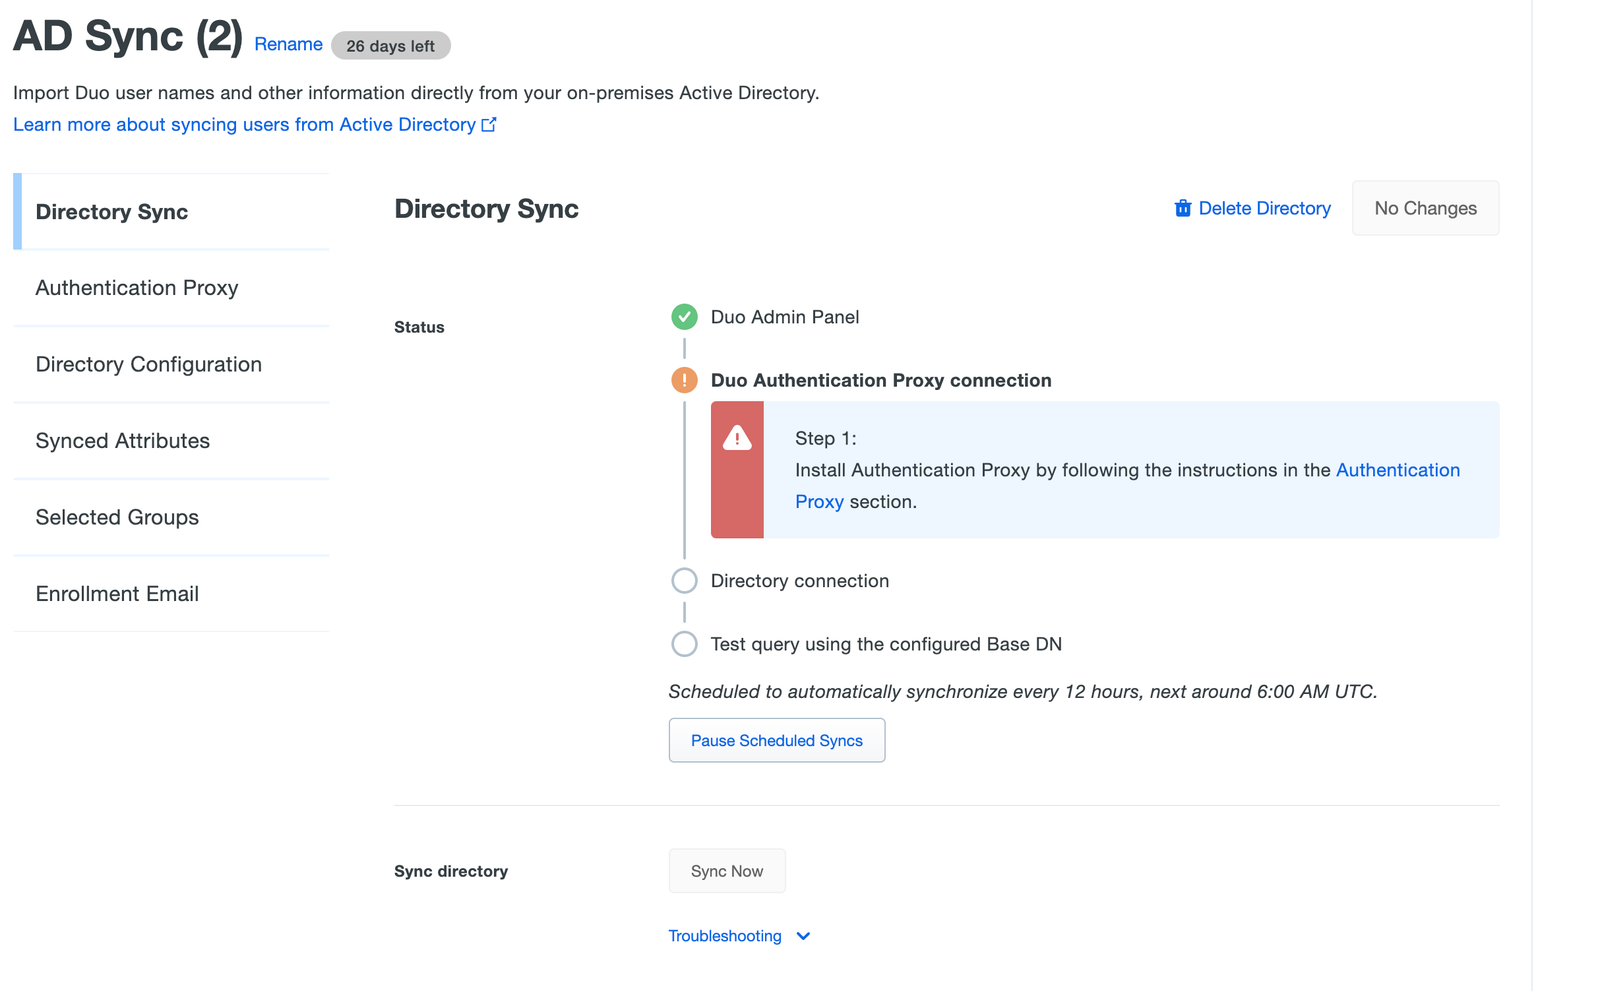
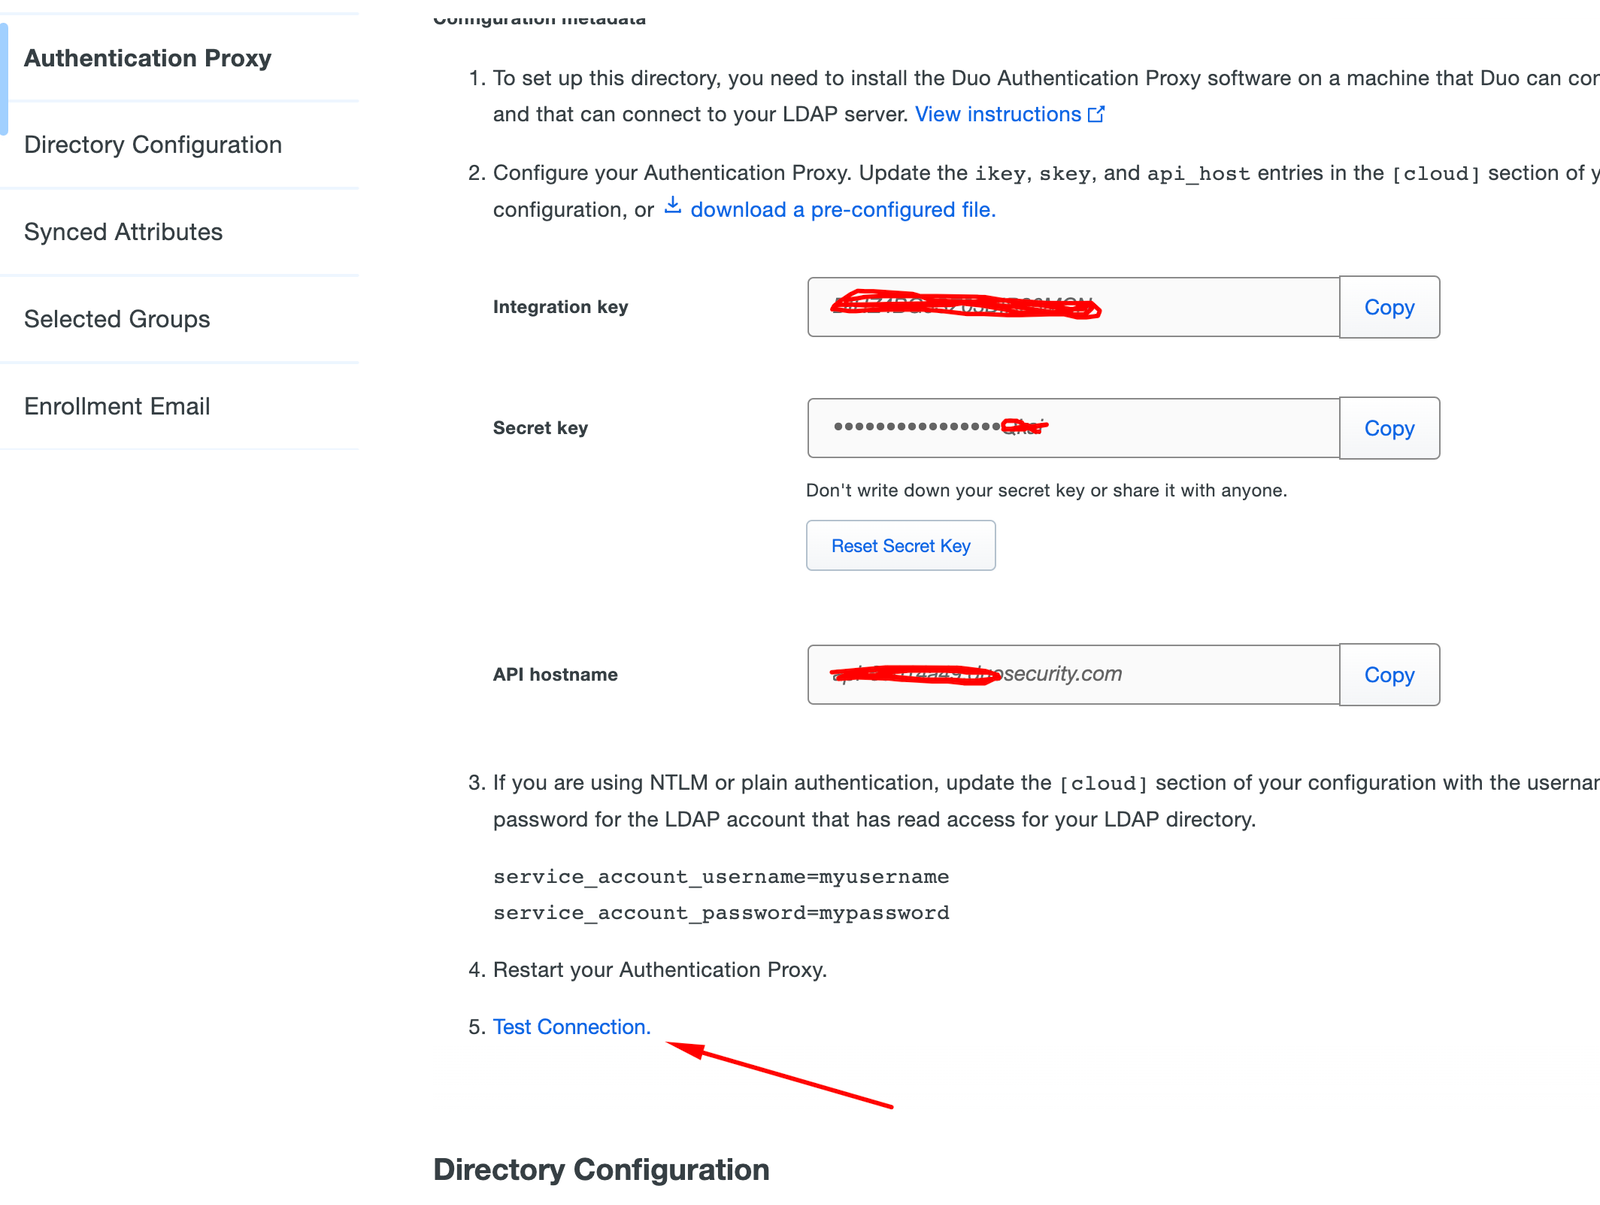
Again you should take note of the information like Integration Key, Secret Key and api-host, we will use those informations in the confi file configured before:

Return to the authproxy.cfg and create a new session called Cloud, use the same information collected before:
After that, return to the Directory Sync on duo.com, and click Test Connection:
Now, fill the information about the DC and use Plain as Authentication Type, you will use the same service account to login: (of course the Duo Cloud doesn’t need to resolve the Domain Controller name, in my case dc1.laboratorio.local)
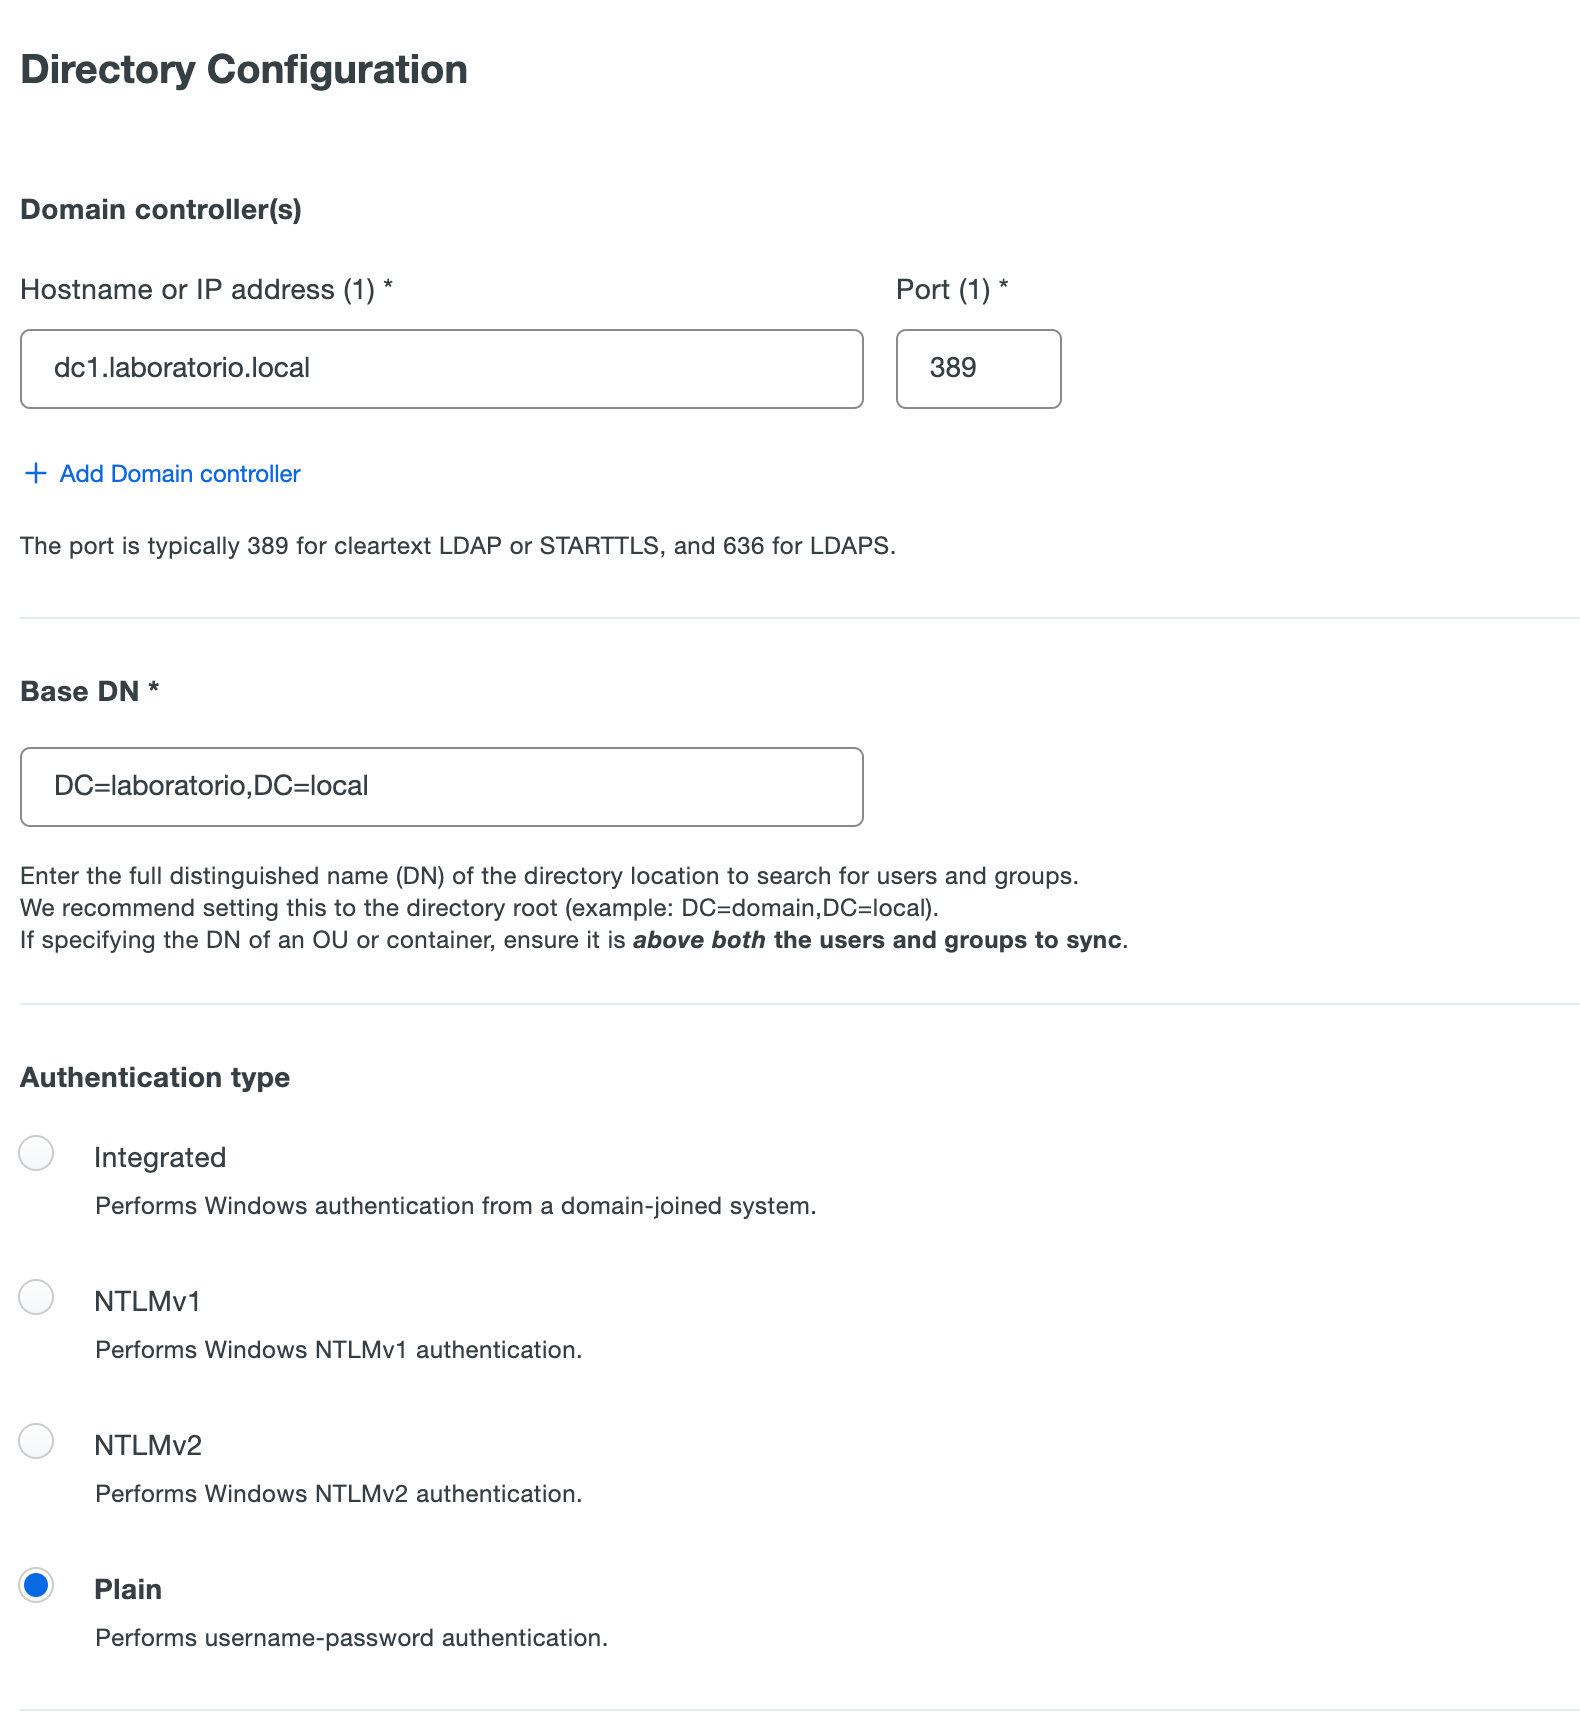
Optionally it is possible to configure which groups will be synchronized.

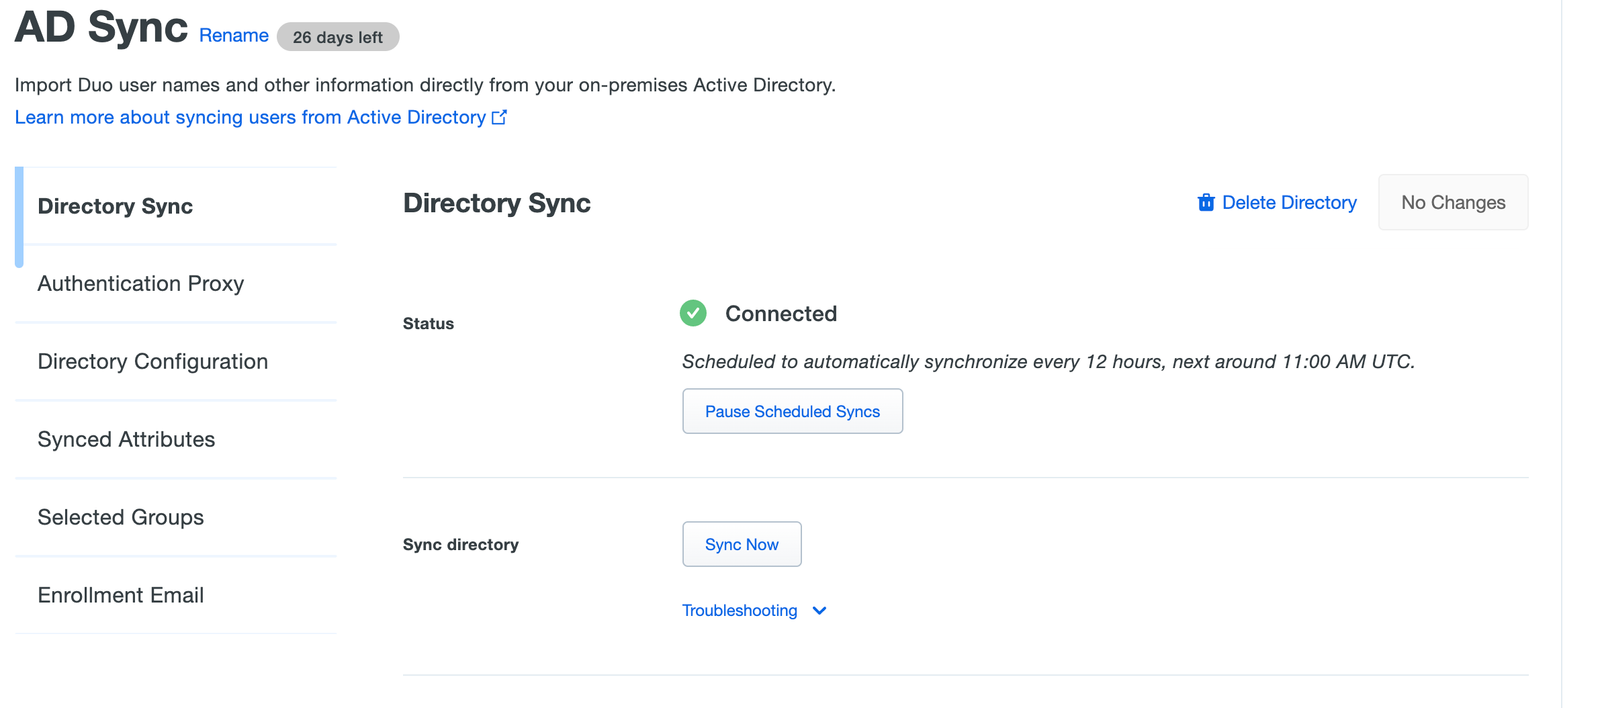
Now, at the top of the page, click in Sync Now

At this point, you should see a message like Connected
Now, you should see all users synchronized.

Click on any of the users previously synchronized and Send Enrollment Email on the top of the page. (Obviously the information like email and phone must be filled in the identity provider, in my case AD)

The user will receive an email like the following:
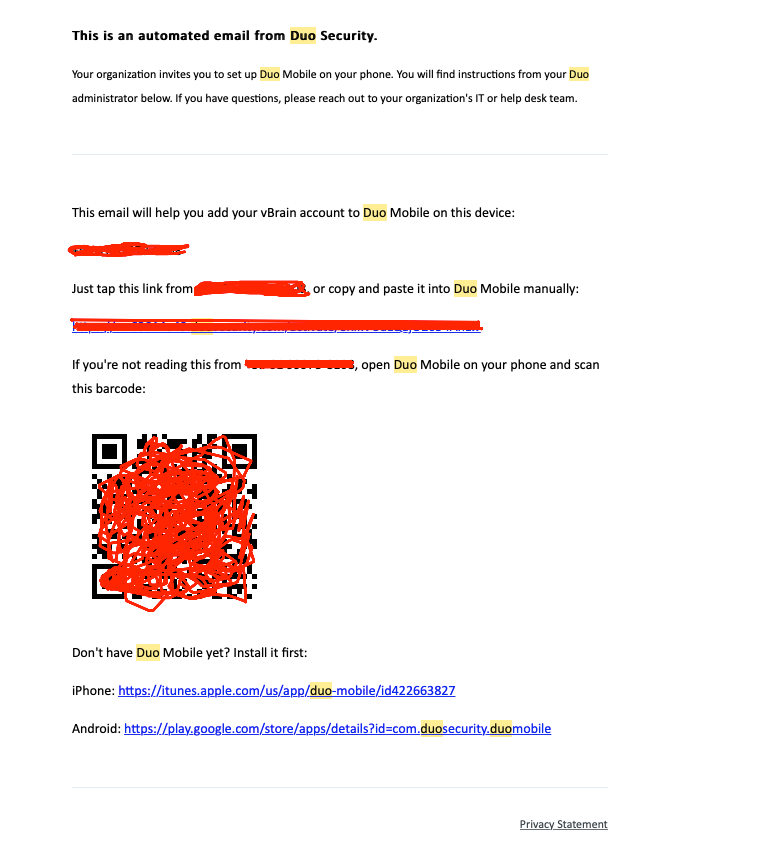
Download the Duo app at the Play Store or App Store and scan the QR Code received.
Now all vCenter authentication attempts will first be authenticated with AD users and then a PUSH notification will be sent to the mobile App.
Follow the configuration file as a reference and to help Control-C and Control-V:
;[main]
; CLIENTS: Include one or more of the following configuration sections.
; To configure more than one client configuration of the same type, append a
; number to the section name (e.g. [ad_client2])
[ad_client]
host=dc1.laboratorio.local
service_account_username=XXXXXXXXXXXXXXX
service_account_password=XXXXXXXXXXXXXXXXXXX
search_dn=DC=laboratorio,DC=local
security_group_dn=CN=XXXXXXXXXX,CN=Users,DC=laboratorio,DC=local
port=389
#[duo_only_client]
; SERVERS: Include one or more of the following configuration sections.
; To configure more than one server configuration of the same type, append a
; number to the section name (e.g. radius_server_auto1, radius_server_auto2)
[ldap_server_auto]
client=ad_client
ikey=XXXXXXXXXXXXXXXXXM5F
skey=XXXXXXXXXXXXXXXXXXXUdyg
api_host=XXXXXXXXXXXXXXXX.duosecurity.com
port=389
exempt_ou_1=CN=XXXXXXXXXX,CN=Users,DC=laboratorio,DC=local
#exempt_ou_2=CN=fernando,CN=Users,DC=laboratorio,DC=local
exempt_primary_bind=false
failmode=secure
[cloud]
ikey=XXXXXXXXXXXXXXXX30MCN
skey=XXXXXXXXXXXXXXXXXXXXX9UQkai
api_host=XXXXXXXXXXXXXX.duosecurity.com
service_account_username=XXXXXXXXXXXXXX
service_account_password=XXXXXXXXXXXXXXXXXX

